
1. We use only an official Docker image as the basis for the application
For example, you're writing your application in Node.js and need to build and run it in Docker.
We use the official node image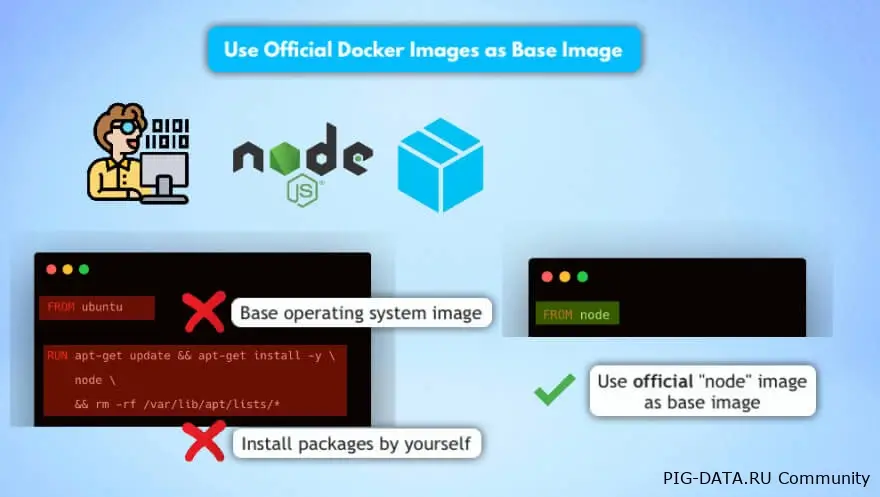
What does this give us?
- Less clutter in the Dockerfile
- An image optimized for Node.js
2. Versioning your Docker image
We took the image. Now we need to specify a version, since by default the latest version is used.
Why do this?
❌ - You may get a version that differs from the previous build or a build on DEV environments
❌ - The newer version may have problems or may fail to build
❌ - latest says that it's experimental and doesn't guarantee stable operation
As you can see, we should specify a specific version.

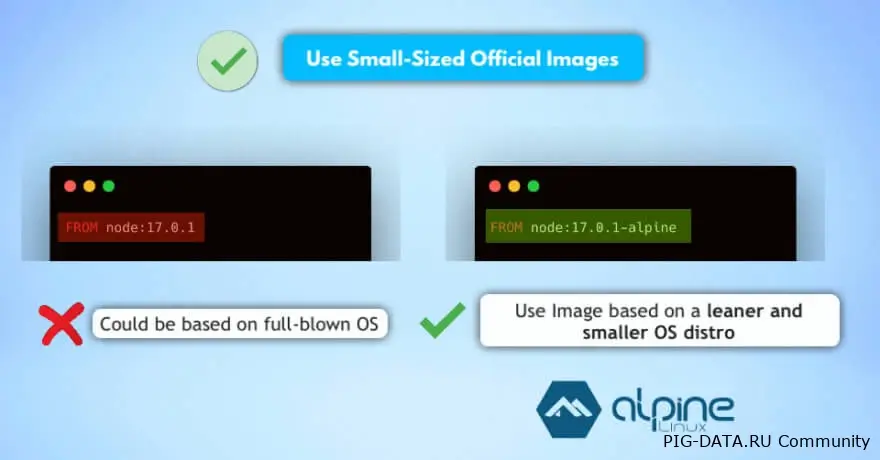
3. Use only the smallest image sizes
There are quite a lot of Node.js images. They differ not only in version, but also come with a large selection of operating systems:

1) Image size
❌When using a full distribution, for example Centos, you'll get a lot of additional components that will take up space and that you're unlikely to use.
✅ It's better to use a slimmed-down version of the distribution and install the components you need. You'll get a smaller image and need less storage space and less time to deploy the environment.
2) Security
❌ The more system components there are, the higher the chance that your image will contain a vulnerability.🙉
✅ Experience shows that the fewer components included in the distribution, the lower the chance of your environment being hacked and your project accessed.
4. Cache your image builds
1) What are layers?
Docker images are created from a Dockerfile.
Each command or instruction written in a Dockerfile creates a "layer":

2) What about caching?
Docker puts all the layers in its cache. 👍
As a result, when there are no changes, Docker uses the cache to create the image.
Advantages of layer caching:
✅ - Fast layer creation
3) Caching and optimizing it
What you need to know:
After changes are made to a layer, everything has to be recreated from scratch: Change something in the Dockerfile, and the cache for all subsequent layers will be recreated because they're considered outdated. 😣
List all the commands in the Dockerfile from the ones you use least often to the ones you use all the time, so you can use your cache properly and optimize the speed of creating your image 🚀
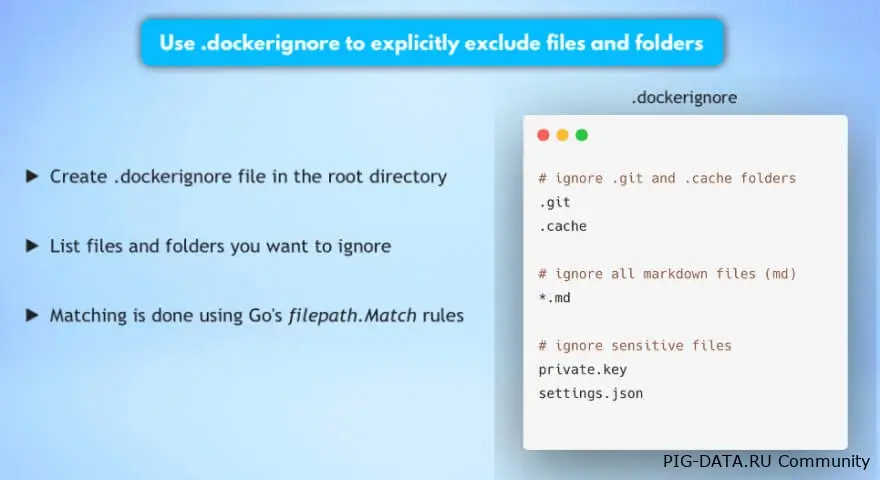
5. Use the file .dockerignore
You can add folders like target и build file readme you don't need them, and you definitely don't need to generate them constantly. 🤔
👉 Используем.dockerignore.
Everything inside the file is ignored during creation; you only need to list the directories and files.
6. Use Multi-Stage
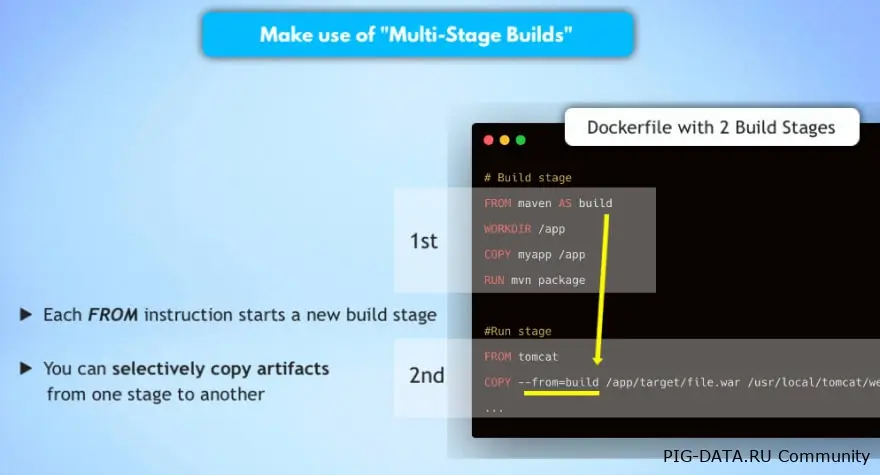
There are tools that you only need for developing and testing your project; you don't need them in PROD.
Such tools usually have more vulnerabilities and increase the size of your project🧐
Exclude everything unnecessary by using multi-stage builds 💡. This lets you use several temporary images during the build process, but keeps only the final image for the PROD environment:
7. Use a user with the fewest privileges possible
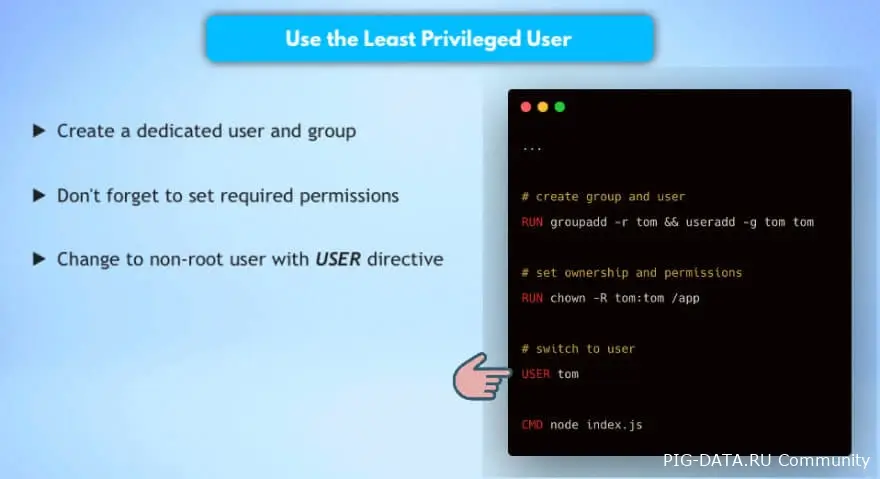
The default user for a Dockerfile is root 🙉 that definitely won't do, so we need to do something about it.
❌ You know this isn't even remotely safe.
If someone gets access to root you could lose access to the hardware, and your entire project could be leaked and the database fully accessed 🤯 there's always a chance you'll use a library with a vulnerability.
✅ Create a user with permissions for a specific directory and specific applications, and assign it to a dedicated group in the Docker image to run your project:
8. Check your images for security holes
So how can we make sure there are no security holes? 🧐
Use the command to check security docker scan. 🔍
In the background, Docker uses the snyk service to check images for vulnerabilities.
An example of the output